Hi guys, welcome to my blog where I share my tips and tricks on how to use Azure. In this post, I’m going to show you how to use the update management center (preview) feature in Azure to manage updates for your virtual machines.
What is update management center?
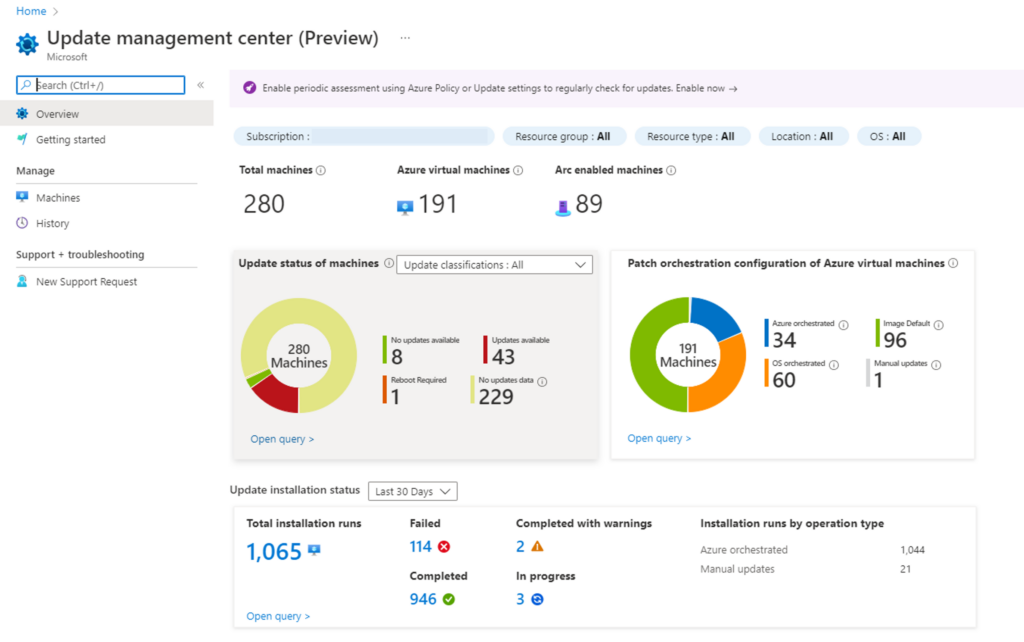
Update management center is a new service that lets you monitor and manage updates for your Windows and Linux machines across Azure, on-premises, and other cloud platforms. You can see the update compliance status of your machines, deploy updates in real time or schedule them for later, and use flexible patching options such as automatic VM guest patching, hotpatching, or custom maintenance schedules.
Why should you use update management center?
Update management center has many benefits over the previous Azure Automation Update Management feature. For example:
- It has a native experience with zero onboarding. You don’t need to create or configure any Log Analytics workspaces or Automation accounts to use it.
- It supports Azure policy for periodic assessment and scheduled patching at scale.
- It has global availability in all Azure and Azure Arc regions.
- It works with Azure roles and identity for granular access control at per resource level.
- It syncs patch cycles with Patch Tuesday, the day when Microsoft releases security fixes every month.
How do you use update management center?
Using update management center is easy and intuitive. Here are the basic steps:
- Sign in to the Azure portal and navigate to Update management center (preview).
- Select Getting started, On-demand assessment and updates, and select Check for updates.
- In the Select resources and check for updates page, choose the machines you want to check for updates and select Check for updates.
- Wait for the assessment to complete and view the results in the Update compliance page. You can see the compliance status, missing updates, and available updates for each machine.
- To deploy updates, select one or more machines and select Deploy updates.
- In the Deploy updates page, choose the updates you want to install, set a deployment name, and configure the deployment options such as schedule, reboot settings, pre/post scripts, etc.
- Select Deploy and wait for the deployment to complete. You can monitor the progress and results in the Update deployments page.
That’s it! You have successfully used update management center to manage updates for your machines.
I hope you found this post helpful and informative. If you have any questions or feedback, please leave a comment below.
Thanks for reading!