
![]()
Hello guys, Today I’m bringing you Traffic Manager, a great solution that enables traffic routing based on DNS, whether for failover, performance, geographic access or weighted round robin.
- Priority: Prioritize an endpoint and the others are in standby according to the configured priority.
- Weighted: When there is a need to distribute traffic among a set of endpoints, either uniformly or according to defined weights.
- Performance: When you have endpoints in different regions and end users distributed in those regions, prioritizing each one’s connection according to the “closest” endpoint.
- Geographic: Users will be directed to specific endpoints (Azure, External or Nested), based on originating DNS queries.
Abaixo lhes mostro um Exemplo de Traffic Manager com base emPRIORIDADE:
For this lab, two test WEB servers were provisioned, one in Brazil and one in the United States, through a JSON template consisting of the distribution of Ubuntu Linux and Apache HTTP server.
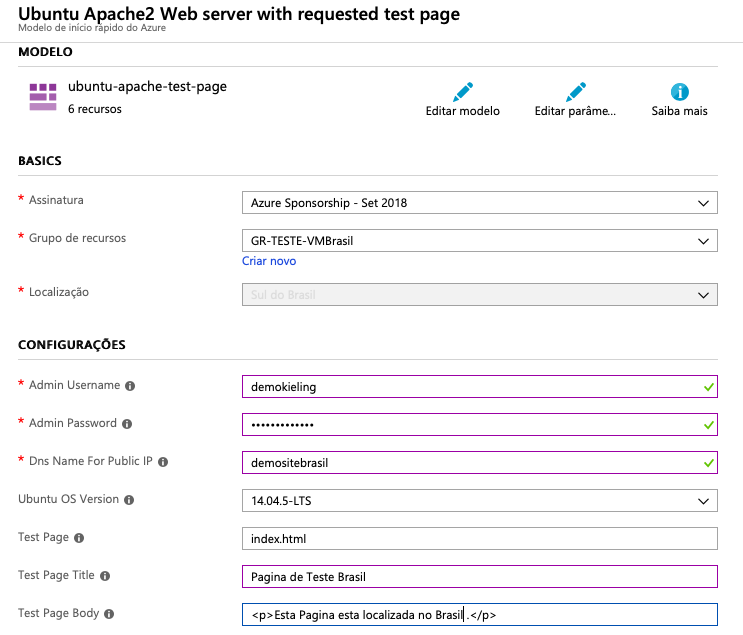
- Through a JSON template, a Virtual Machine was configured in the SOUTH OF BRAZIL region, containing a test page with the title “Test Page Brazil” and with a simple body: “This Page is located in Brazil”
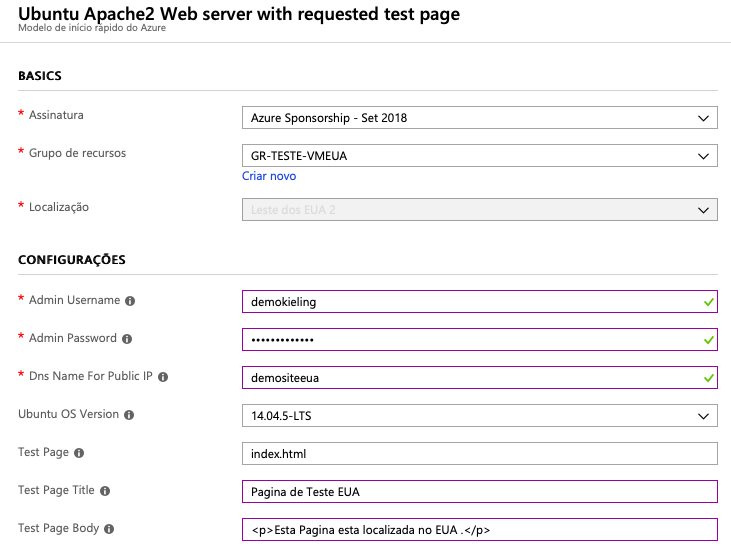
- Also, through the same JSON template, another Virtual Machine was configured in the EAST US 2 region, containing another test page with the title “Test Page USA” and with a simple body: “This Page is located in USA”
 https://demositeeua.eastus2.cloudapp.azure.com
- Below we can see the virtual machines that were created, one in Brazil and one in the USA, each with a page hosted on its respective server.

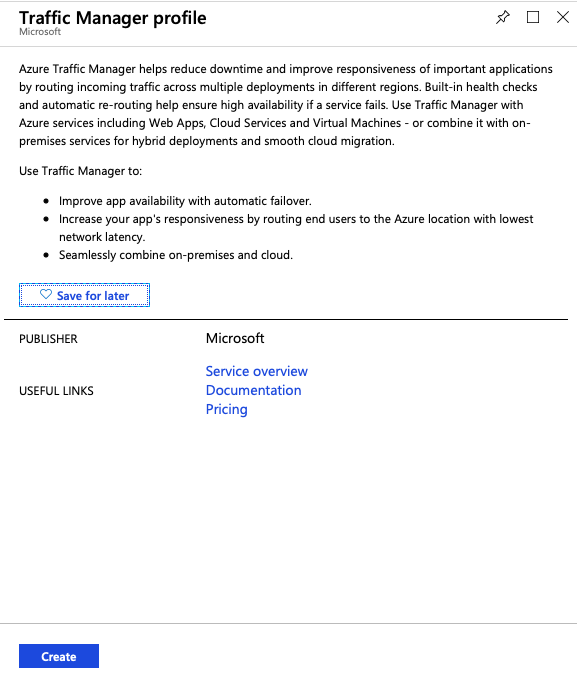
- With the WEB server infrastructure created, the next step is to DEPLOY our Traffic Manager. Just go to the Marketplace and type “Traffic Manager Profile”, select it and click to create:

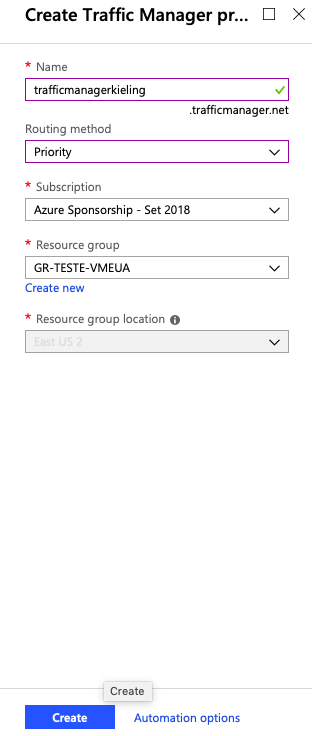
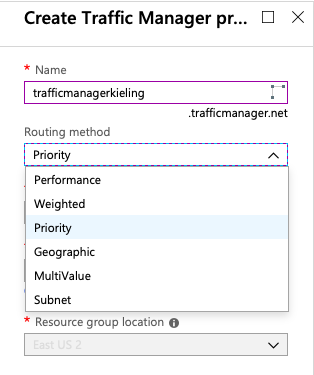
- It will then be necessary to define a name/address for this Traffic Manager, and in this case it was defined as an example, “trafficmanagerkieling.trafficmanager.net”. After that, select the routing method I mentioned in the introduction, whether it is based on priority, performance, weighted or geographic. In the example, Priority was selected:
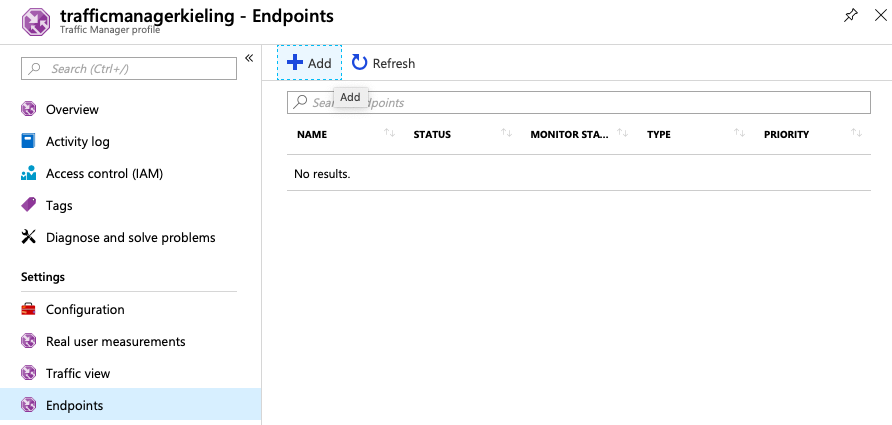
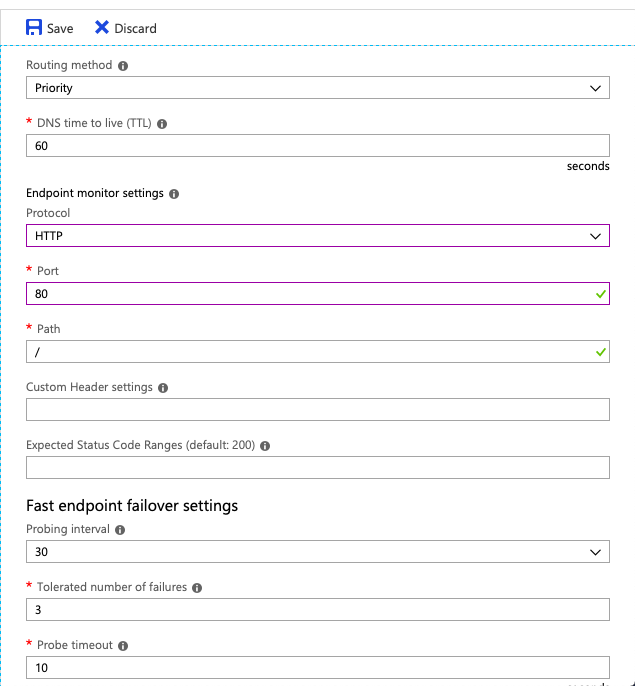
- After creating the Traffic Manager, ENDPOINTS (Endpoint) are defined.

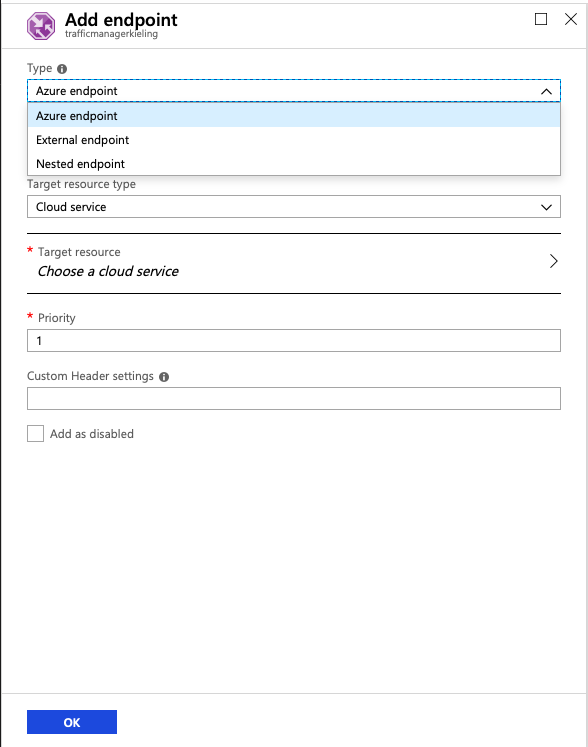
 When adding an ENDPOINT, you will need to choose one of the following types:
Azure Endpoints: Used for endpoints hosted in Azure.
External endpoints: Used for IPv4/IPv6 addresses or for services hosted outside Azure, which can be an on-premises environment or another cloud hosting provider.
Nested endpoints: Used to combine with other Traffic Managers, creating more flexible and large-scale communication for more complex environments.-
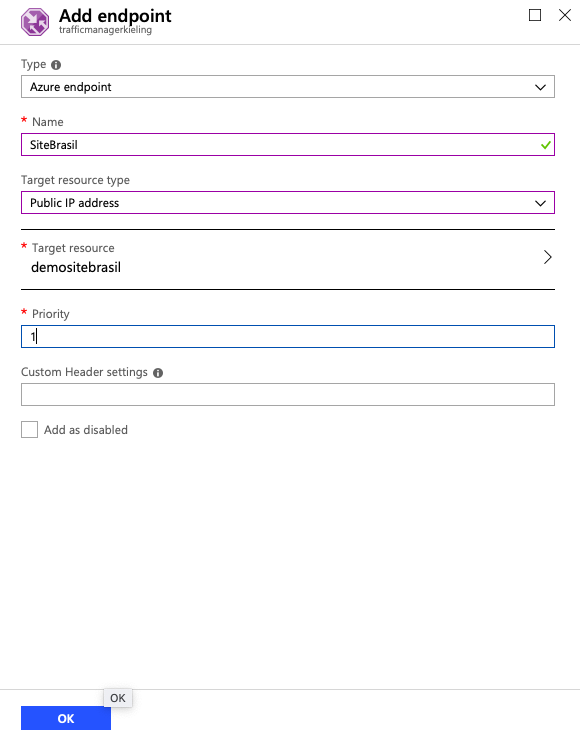
For our first Endpoint, in this example, the name SiteBrasil was given, the type “Azure endpoint” was selected, considering that our Brazilian WEB server is hosted on Azure and also selected the destination type as “Public IP address”, that is, the external IP where my test web page is hosted, thus creating our first endpoint. Priority was also set equal to 1, prioritizing access to this first endpoint.
After creating the Brazil endpoint, it is necessary to create the second endpoint, naming it “SiteEUA”, also selecting the type “Azure endpoint”, considering that our second WEB server is in the USA. Then select the destination type as “Public IP address”, thus creating our second endpoint. Here Priority was set equal to 2, to always prioritize access through the Brazil page.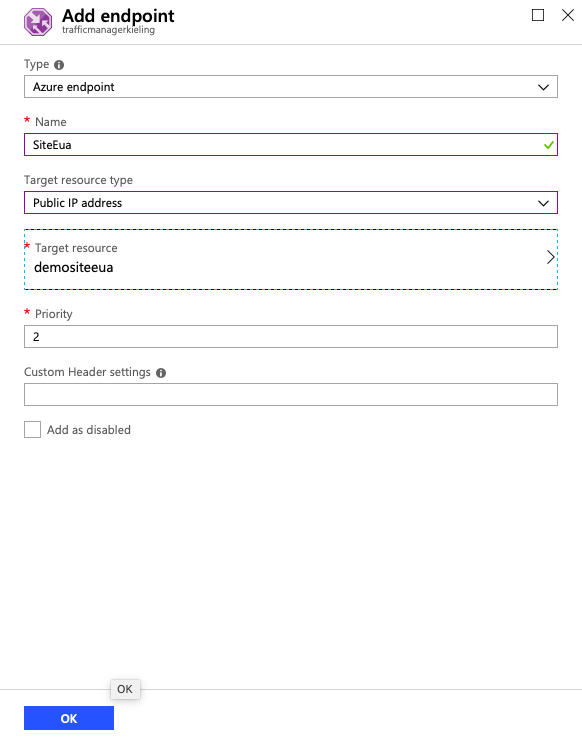
-
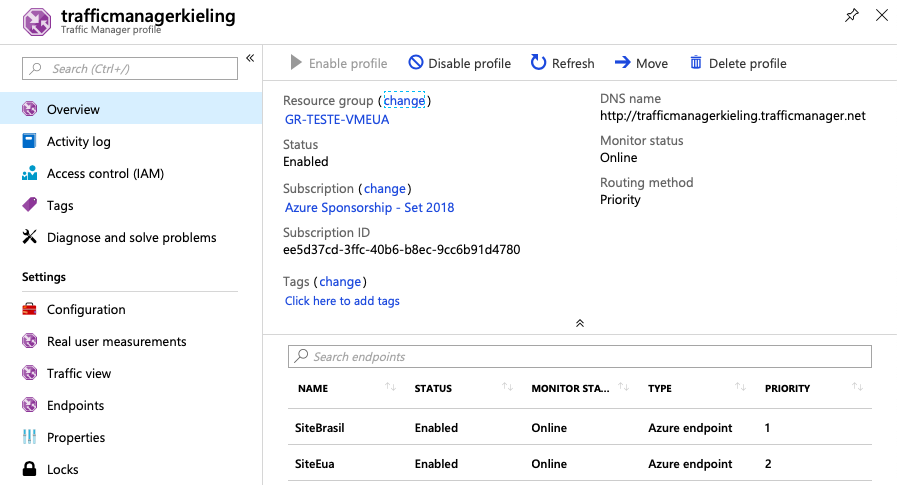
- At the end of configuring STEP 7, we can see that our endpoints become enabled (Enabled) and with active monitoring (Online). It is also possible to view through a unique traffic manager address (https://trafficmanagerkieling.trafficmanager.net), that it is directing to the Brazil page, which we defined as having higher priority earlier, thus completing our Traffic Manager configurations:
- At the end of configuring STEP 7, we can see that our endpoints become enabled (Enabled) and with active monitoring (Online). It is also possible to view through a unique traffic manager address (https://trafficmanagerkieling.trafficmanager.net), that it is directing to the Brazil page, which we defined as having higher priority earlier, thus completing our Traffic Manager configurations:

—————————————————————-
————————Let’s Test!!!!!!
<1>- To test our high availability, I will turn off our server in Brazil:

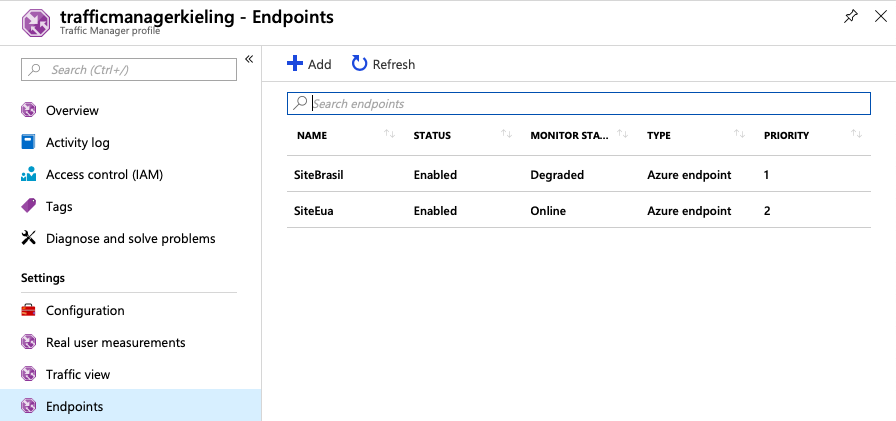
<2>- Note that now our Brazil Endpoint (SiteBrasil) is degraded.
<3>- And when accessing our Traffic Manager address, where we simulate the unavailability of the Page hosted in Brazil, traffic is automatically redirected to the Page hosted in the USA.

DID YOU SEE HOW EASY IT IS??? AND IT’S VERY USEFUL!!!