Hi guys,
In this blog post, I’m going to show you how to secure your connectivity to a Storage Account in Azure. A Storage Account is a service that lets you store and access different types of data, such as blobs, files, queues, and tables. But how do you make sure that only authorized users and applications can access your data?

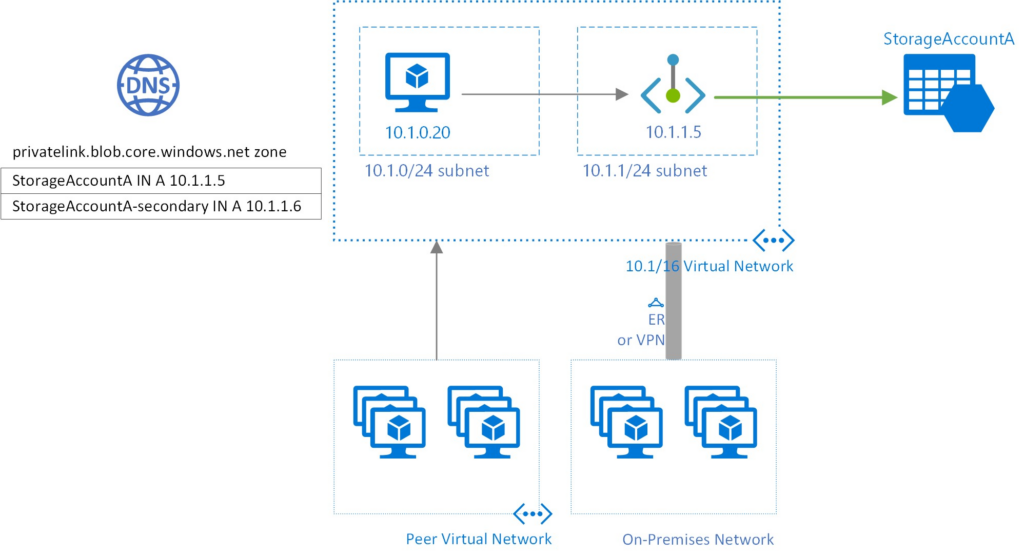
One way to do that is to use Azure Private Link. This feature allows you to create a private endpoint for your Storage Account, which is a network interface that connects to your virtual network. By using a private endpoint, you can access your Storage Account using a private IP address, without exposing it to the public internet. This way, you can reduce the risk of data leakage and network attacks.
To create a private endpoint for your Storage Account, you need to follow these steps:
- Go to the Azure portal and navigate to your Storage Account.
- On the left menu, select Networking.
- Under Private endpoint connections, select + Private endpoint.
- On the Create a private endpoint page, fill in the required information, such as the name, region, subscription, resource group, and virtual network of the private endpoint. You also need to select Microsoft.Storage/storageAccounts as the service and choose the sub-resource that you want to connect to (such as blob or file).
- Click Review + create and then Create to create the private endpoint.
- Once the private endpoint is created, you can see its details on the Networking page of your Storage Account. You can also see the private IP address that is assigned to it.
That’s it! You have successfully created a private endpoint for your Storage Account. Now you can use this private IP address to access your data securely from your virtual network. You can also use Azure DNS Private Zones to resolve the name of your Storage Account to the private IP address.
I hope you found this blog post helpful. If you have any questions or feedback, please leave a comment below.
Thanks for reading!
